Showing posts with label Picture Frames. Show all posts

Monday, January 28, 2013

Organizing My Life

Just like millions of other Americans, 
I resolved in 2013 to organize my life, eat better and exercise more.  

For the most part, I have had great success.  I have completed a couple major organizing tasks in my home, I hit the gym 3-4 times per week and we are eating lots of veggies and cutting carbs.  

My most recent organizing project was my home office.  
I share it with a fridge, freezer, washer, dryer and too many coats and pairs of shoes to count.  

My biggest frustration is that I have no drawers for all the little stuff.  
Yes, I had a great file cabinet...but my desk top was always covered with EVERYTHING.  
Plus, my work area was very left sided and I typically have an extra computer going and I was all squished in there.  Ugh.  


Before


Before

So after spending countless hours on Pinterest and looking for just the right file cabinet...I created this.  And I love it.  


After


The top is a $5 door from the bargain area at Menards.  I stained it, then added stripes in Barcelona Orange Chalk Paint.  I sealed it with a few coats of dark wax to age it.  

The file cabinets are from Walmart.  I looked everywhere and they were the only place that had what I wanted.  I'm big on quality and doing things right the first time...so I hesitated a little, but when I saw the same ones at Target (wrong color), I was sold.  They were cheap...like $40.  I initially bought two, but decided a third one would fit...so we'll add that one later. 


See the nice little drawer at the top.  Perfect.  


I had pinned this sign a long time a ago and still loved it as I was searching for some artwork.  This canvas has been painted with a dinosaur, words to remind my children to flush and now this.  Free!  


I snagged this paper holder from my son's room...it has sat empty for two years.  Mine.  

I am loving it.  
Now it's time to get both computers going and pull out my files...I have work to do.  


Renae


Monday, October 8, 2012

Fall Fun Day

The boys are off of school today and my husband is combining corn 
with his uncle...so we are having a fall fun day. 

 It is 2:00 in the afternoon, the wind is blowing and a few sprinkles of rain are hitting the ground...soup is simmering and we are still in our pj's.  Perfect.  

The fall decorations have been up for a few weeks, but today we added a few touches of Halloween.  Here are a few pictures the boys took.  


Haunted house and spooky tree. 


New bats from Lewes, Delaware hang from the chandelier.  


Pumpkins. 


Haunted house and a splash of orange.  


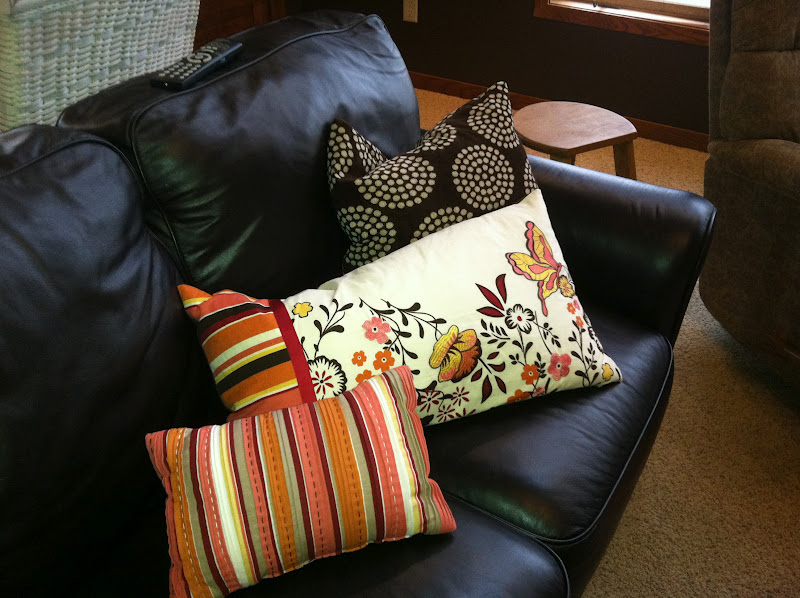
Fall pillows.  


Pumpkins in my old wagon that I adore. 


Boo. 


I have had this pumpkin person for years.  

A friend from Luther Memorial Home in Mayville made these and sold tons of them to her co-workers.  It is still one of my favorite decorations to pull out. 
I have great memories of LMH and the people there.  

Anyway...Casey added a few pirate accessories this year.  Funny.  


Grandpa Pete's spider.  


My Grandparents old player piano is adorned with pumpkins and pictures.  


Hey. Where you going?  

This motion sensor skull was Grandpa Pete's and it still freaks us out!  


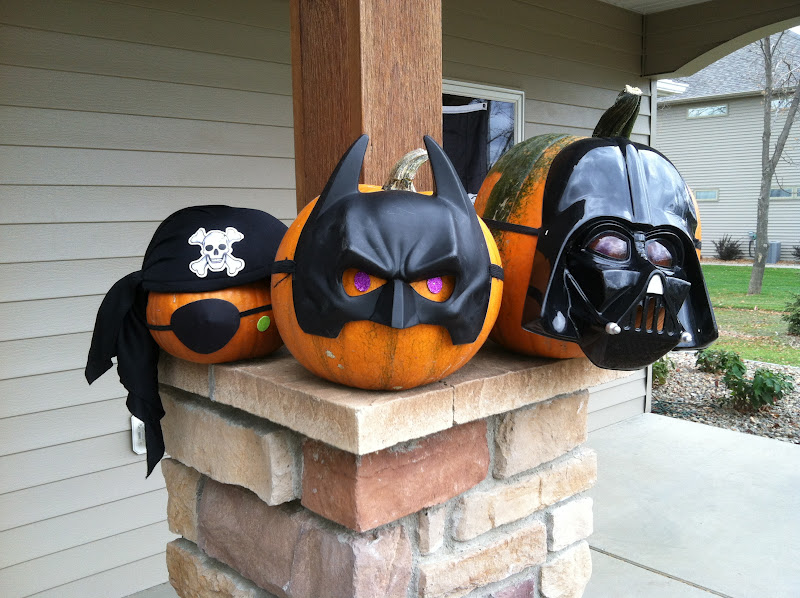
We added a few masks, hats and wigs to our pumpkins.  Love it.  


This is a tattoo...for a pumpkin.  Pretty neat. 


I love fall pots.  


Fall is in the air...and now it's a little spookier on Island Road.  

Enjoy your day.  

Renae


Saturday, July 21, 2012

Beachy Bath

Our boys have never really used their upstairs bathroom...they go the bathroom in there, but they have always showered in our master bath and brushed their teeth and combed their hair in the guest bath.  Why?  Not sure.  


The decorating in their bathroom was okay...remnants from the dinosaur days, some of their artwork, hand-me-down shower curtain and accessories.  
It needed an update. So, one night as my husband cruised away on the 
boat to meet up with some high school friends...we went shopping.  

It was fun.  We popped through Kohls and the boys had fun laughing at the shower curtains that they thought looked like dresses.  No luck there.  

Next was my ever reliable TJ Maxx...Thomas walked in and saw all the fun college gear and exclaimed "I love TJ Maxx".  He was serious...there are treasures everywhere.  
But we had no luck. 

We were in search of a beach theme...so we headed off to Target.  
And guess what?  

We found EVERYTHING we needed to achieve our beach theme.  


Shower curtain in navy and white stripes ($14.99) and a framed 
starfish print (on sale $16.99).  I had found the towel hooks a couple years ago on major clearance (at Target) and finally put them to use.  The walls are painted a soft tan by Sherwin Williams (they look yellow, but they are tan).  

The towels and rugs they had in the bathroom were navy and the green that you see in the above picture.  They were like new and did not need to be replaced...so we were able to find the perfect shower curtain and use the current towels and rugs. 


The frames below previously held the boys' artwork.  
We had lots of shells that their Great-Grandma Lois had collected over the years...so we placed them on the photocopier to make prints.  


This one was larger that our copier could accommodate...so we cut 2" squares and made this.  It is awesome...and free!  


Here are the other two they made.  Love them.  


We found this fish ($19.99) and the lantern ($16.99) below at Target too.  We filled the lantern with the shells from Grandma Lois.  Love them!  


A couple closer pictures of the shell art we created.  


The final touch was a new light.  The old one was dreadful.  
Now it's modern and fun.  

The best part...they love it and they use it for #1, #2, showers, teeth and hair!  No more chunks of toothpaste in my guest bath.  Mission accomplished.  

FYI:  We arrived home at about 9:30 that night and got to work.  Finished it up at about 11:00.  They loved pulling it all together.  

We've recently redecorated their bedrooms (Casey's room and Thomas' room) and I find that if you let them have some input, use their ideas and work together...they will appreciate it and take care of it.  

Renae


Thursday, January 19, 2012

Flush


I made this sign today...for the upstairs bath that my two boys share.  
We obviously have a problem.  

My boys are 7 and 10, they both can read and now I hope they both will flush.  
Enough said.  


At one point their bathroom had dinosaur paintings done on canvas...I switched those out a while ago, but saved the paintings.  I re-used the largest one and used the same technique as in my earlier post that you can find here.

The vinyl letters are from Hobby Lobby in three different sizes and I used leftover paint from our house...lemon verbana and navajo white (Sherwin Williams).  

I distressed it quite heavily as I did have some paint bleed through...I don't know if the latex paint or the canvas that caused the issue, but it didn't bleed through with the chalk paint and the paper print that I used before.   

I like how a little of the blue peeked through.  


My boys think it is hilarious and as I sit here typing this post 
I just heard my husband say "Who didn't flush?"  

I think I need to put one in every bathroom or 
start charging them when I find an un-flushed toilet.  

Renae

Monday, January 9, 2012

Character


I've been wanting to do this project for a while and when my husband called to say he could pick up the kids from school...I got started.  

This is a print from Kohl's that used to hang in our upstairs hallway.  After we repainted this summer, I knew it wouldn't be used again as it was...
but I knew it had potential.  

As I was clearing my desk today I found a set of vinyl wall words that I have intended on hanging in one of our boys' rooms for quite some time...
but putting it on the wall is so...permanent.  


First, I put two coats of old white paint on the picture. This is an unframed picture that is sturdy...not a canvas, but that would work too. 


I measured and adjusted the words to fit the dimensions of the picture...
the word CHARACTER just fit.  

It was meant to be.  


I attached the wall vinyls following the package instructions and 
sealed them real good with the tool they provide.  


Then a coat of graphite paint was 
applied over the entire surface. 


Once the graphite paint was dry, I used a razor blade to lift the vinyl and peel it off.  It was going well, until RIP!  The "A" was connected to the letter below it and I tore the paper on the original picture.  If I hadn't had three little boys watching me I would have used a few choice words.  Dang. 


So, I got out my pencil and drew in some lines and painted around them.  


Not too bad of a repair job...even my husband was impressed. The paper backing is a little crinkly...a canvas would work perfect for this project.  


I lightly sanded the edges and the entire surface to age it a little and blend in some of the paint that bled through.  


I covered it with a little wax and buffed it.  I propped it up in the guest room, but it will hang in our oldest son's room...hopefully as a constant reminder. 


Thanks for visiting.

Renae

greenbriargoods@hotmail.com